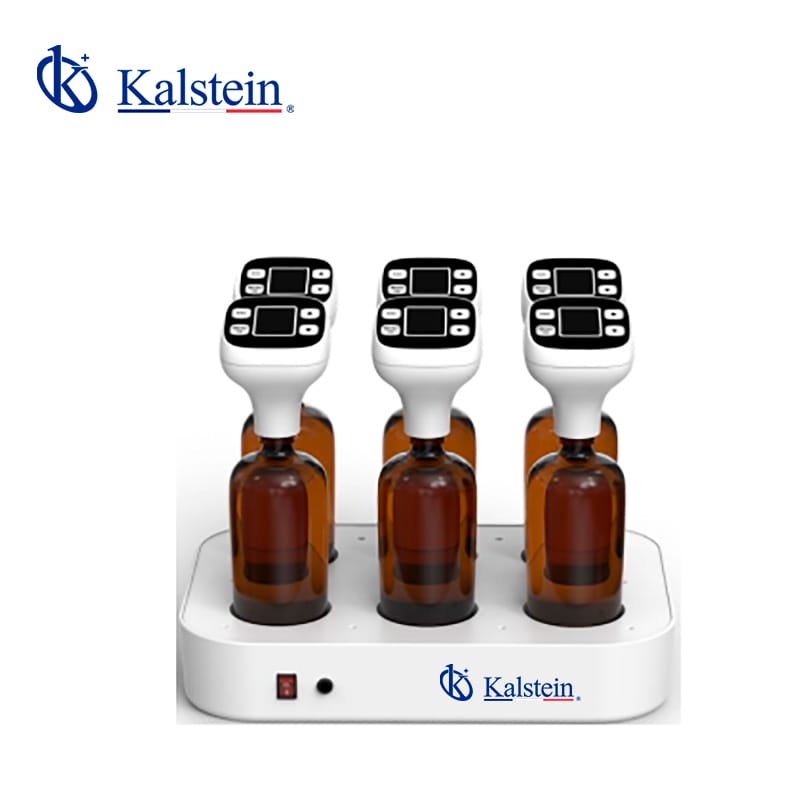
Installation and Startup Guide for the YR06297 BOD Analyzer
The YR06297 BOD Analyzer is a cutting-edge instrument designed for measuring Biochemical Oxygen Demand (BOD) using the international pressure difference method without mercury. With six independent analysis channels, it guarantees no interference between culture bottles, delivering accurate real-time results throughout the process. This comprehensive guide discusses the installation and startup procedures necessary to ensure optimal operation of the YR06297.
Technical Specifications of the YR06297
| Specification | Details |
|---|---|
| Model | YR06297 |
| Test Range | 0-4000 mg/L |
| Test Error | Meets the accuracy testing standard for water quality BOD5 (glucose glutamic acid standard solution BOD5=180-230 mg/L) |
| Test Duration | 1-30 days |
| Test Quantity | 6 pieces |
| Recording Interval | 24 minutes - 12 hours/time |
| Storage Quantity | Can save 20 sets of final test data. |
| Culture Flask Solvent | 580 ml |
| Culture Temperature | 20 ±1 °C |
| Power | 110-220V, 50/60Hz |
Unboxing and Initial Setup
Before beginning the installation of the YR06297 BOD Analyzer, it is essential to perform an unboxing checklist. Ensure that all components are present and in good condition. The contents typically include the analyzer itself, power cable, user manual, and any additional accessories such as sample bottles or calibration solutions.
The next step involves anchoring and leveling the device to ensure stability during operation. Place the analyzer on a sturdy and level surface to avoid operational errors caused by vibrations or tilting.
Power-Up Sequence and First-Run Calibration
After positioning the YR06297, connect the power cable to a suitable power source, complying with the specified voltage and frequency requirements. Upon powering up the device, follow the on-screen prompts to initiate the first-run calibration. This process ensures that the analyzer is accurately set to measure BOD levels based on the provided calibration standards.
It is crucial to validate the first measurement by running a known standard sample. Document the results to confirm that the device is functioning correctly.
Common Setup Mistakes and How to Avoid Them
One common mistake during setup involves neglecting environmental conditions such as temperature and humidity. The YR06297 operates optimally within specified ranges; thus, ensuring that the surrounding environment is suitable is vital. Additionally, failing to level the analyzer properly can lead to inaccurate readings.
To avoid these issues, always refer to the user manual for detailed instructions and maintain a checklist to verify each step during installation.
Regular Maintenance and Calibration Procedures
To ensure longevity and accuracy, regular maintenance of the YR06297 is essential. This includes cleaning the sample chamber and verifying calibration on a scheduled basis. Following the manufacturer's recommendations for maintenance intervals will prevent potential issues and keep the analyzer performing at its best.
Calibration should be performed using standardized solutions to ensure the accuracy of the readings. Document all calibration results and maintenance actions to maintain a detailed history for future reference.
Troubleshooting Common Issues
In the event of operational issues, it is important to troubleshoot systematically. Common issues may include error codes, inconsistent readings, or the device not powering on. Each of these symptoms can be addressed by consulting the user manual for specific error codes and their meanings.
For instance, if the device does not power on, check the power source and connections. If it displays an error code such as E-03, refer to the troubleshooting section in the manual for detailed diagnostic steps.
Symptom-Cause-Solution Table
| Symptom | Possible Cause | Solution |
|---|---|---|
| Device does not power on | Power source issue | Check power connections and wall outlet |
| Error code E-03 | Calibration failure | Re-calibrate the device using standard solutions |
| Inconsistent readings | Sample contamination | Ensure samples are handled and stored properly |
Frequently Asked Questions
What is the testing range of the YR06297?
The YR06297 has a testing range of 0-4000 mg/L, which is suitable for a wide range of applications in water quality testing.
How often should the YR06297 be calibrated?
Calibration should typically be performed at regular intervals, depending on usage frequency. It is advisable to calibrate the device before any significant series of tests to ensure measurement accuracy.
What maintenance is required for the YR06297?
Regular maintenance includes cleaning the sample chamber, checking the calibration, and ensuring external components are free from contamination. Follow the manufacturer's guidelines for specific maintenance schedules.
How long does a typical BOD test take with the YR06297?
The duration of a BOD test can vary between 1 and 30 days, depending on the sample composition and testing requirements.
Can the YR06297 store test results?
Yes, the YR06297 can store up to 20 sets of final test data, making it easy to retrieve past results for analysis and record-keeping.
What are the key advantages of using the YR06297?
The YR06297 offers high precision, complete automation of tests, and efficient storage of results, making it ideal for modern laboratories.
If you are looking for a fusion of innovation and quality, you have come to the right place. At Kalstein, we offer you the luxury of exploring our exclusive catalog of laboratory equipment. We manufacture every device to the highest standards of excellence. Our intuitive and seamless online purchasing channels are designed for your convenience, securing the most competitive prices. Hesitate no longer — we bring science to life, it is time to become part of our community.